Have you ever spent hours looking for your keys? Have you ever been late to an appointment because you couldn’t find your shoes? Living in an unorganized space limits your ability to enjoy your life fully. By tidying up your apartment, and decluttering your place, you can save time, energy, and you can even boost your mood.
Step One: Evaluate Your Space
Take some time to evaluate your apartment. Think about how you want each room to function and what activities will take place in each area. For example, if you use your living room for entertaining friends or finishing office work, organizing paperwork, board games, and other related items in the same room is a good idea.
After evaluating your apartment, mentally divide each room into zones and assign each space a function. For example, in the kitchen, designate one cabinet for spices and baking supplies and another for dishes. If you use your dishwasher often, place your dishes in a cabinet close by. Likewise, if you cook often, organize your spices in an easy-to-reach space near the stove.
Once you finalize your zones, begin the organization process. Choose a room to begin in and set a time limit for that space before moving to the next one. Then, start small. Divide the room into smaller sections to make the process less overwhelming. Instead of trying to reorganize an entire bedroom at once, begin with a few drawers or a closet. Then, work your way around the room for dedicated, methodical organization.
Step Two: Declutter Your Apartment
Now that you have a game plan, follow these steps to declutter your apartment:
1. Remove Everything from the Zone
Yes, everything! Once you pick a small zone to begin with, withdrawing every item within that area will help you visualize how to organize the room and which items you want to keep. Whether you’re clearing out a bookcase, kitchen cabinets, or a small drawer, removing the items within the space will give you a clean slate. Place everything on a large surface like a kitchen island, a table, a bed, or the living room floor. After everything is out, do a quick clean of the area. This can include wiping surfaces with disinfectant, sweeping, or vacuuming the floor.
2. Begin Sorting
As you begin sorting your items, labeling is key. Separate your items into piles, place them into bags, or drop them into containers. Next, label each stack with the following categories:
- Keep – These are the items you wish to keep in the home. Only place items relating to the function of the space in the keep pile.
- Relocate – These are items you wish to relocate to another location. For example, if you want to keep your sewing machine, but currently don’t have the space to store it, you could relocate it to a storage unit.
- Donate – These are items you wish to give to friends, family, or local charities. You can receive a tax reduction for the items donated if you choose to.
- Sell – These are items you wish to sell for profit.
- Discard – These are items you wish to discard as trash.
Separate your items based on these categories and remember that each item you keep must have a designated place and purpose to stay. As you sort, remember that letting go of certain things is necessary to achieve your goal of a streamlined environment. If you’re struggling to part with some of your belongings, ask yourself:
- Do I use, need, or love this item?
- Will I miss this item, or can I easily replace it?
- Would I rebuy the item again today?
- Does the article add value or practicality to my life?
- Do I have too much of this item? (i.e., eight black shirts, 20 mugs, etc.)
- Is this item broken, worn, or outdated?
- Does it work to its full capacity?
- Does this piece of clothing fit my body or current style?
- Will keeping this item help me achieve an organized space?
For items you don’t want to part ways with, consider taking a photo or designating a single box for sentimental items. Once you finish reorganizing your apartment, you can always return to this box to reminisce or repurpose the sentimental items. For example, some people create quilts from old t-shirts or make a scrapbook for greetings cards.
3. Relocate, Donate, Sell, or Discard the Items
After you finish sorting, immediately move your items to their designated destinations. If you keep items, ensure to orderly fold, stack, or place them back in their space. If you choose to donate items, drop them off at your local charity or schedule a donation pick-up time. If you want to sell your belongings, arrange to sell them online or in person at a local thrift store.
Step Three: Organize Your Space
Organizing is fun for some people, but it can be overwhelming for others. If you’re the latter, follow these tips and tricks to help organize your apartment efficiently.
Group Your Items Based on Similarity
Think about which items you use most often and what you use them with. Then, group these items together for future easy access. For example, if you drink water with your dinner every night, place your plates and glasses in the same cabinet.
Make Items as Accessible as Possible
When placing items back into their proper place, aim to make everything as accessible as possible. The more accessible your items are, the more likely you’ll keep things organized over time. Place the items you use daily in easy-to-reach areas near the purpose of their function. For example, place spices in a cabinet beside the stove if you’re an avid cook. Likewise, if you don’t use an item often, tuck it away to reserve room for your most-used belongings.
Only Purchase Storage Containers After Organizing Your Space
It can be tempting to buy new bins, baskets, and caddies, but don’t make a trip to the store yet. Only buy storage organizers after you complete the organization process. It’s easier to purchase organizers that will enhance the system you already created rather than trying to reorganize everything to fit into the container. To begin, measure your space, take photos, and place your remaining items into groups to help visualize what kind of containers you’ll need. Next, shop for the bins and baskets that will organize your items best and fit your style preference. If you need to, use storage solutions you already have, then purchase new options when you’re ready. Cardboard boxes, laundry baskets, shoe boxes, mason jars, and upcycled candle holders are common examples of temporary storage.
Add Labels to Organizers and Containers
Once you’re satisfied with everything’s place, add labels to the containers. Labels can help you see where everything is located and where to place items when you finish using them. Colored duct tape, chalkboard, magnets, and written and printed labels can be used as signage. Buying organizers and labels that are aesthetically pleasing will make your apartment feel like home and help you stay motivated to maintain a tidy apartment.
Step Four: Find Storage Solutions for Every Room
If you live in a small apartment or have a lot of items, figuring out where to place everything can be difficult. However, it is possible. Remember to check with your landlord before making any significant changes, such as installing wall shelves, so you don’t risk losing a part of your security deposit. Here are some efficient tips and tricks for every room in your apartment:
Any Room
- Add hooks, bars, shelves, and storage caddies inside cabinets or closet doors. You can also add these fixtures to the wall space of closets.
- Use ceiling space by mounting storage shelves in a garage or a hanging pot rack in the kitchen.
- Utilize space over each door in your apartment
- Use multi-use pieces like a bookcase for storage and decoration.
- Consider transforming a closet into an office nook or vanity.
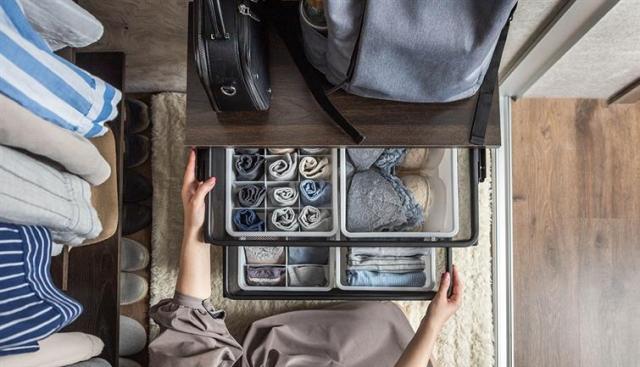
- Use specialty organizers like drawer dividers or utensil dividers to optimize space.
- Use magnetic organizers on the fridge and other metal surfaces.
- Think vertically and buy items like a cube storage system, a storage ladder, or stackable bins to create more space.
- Use trays to corral everyday items like keys.
- Try the “one in, one out” rule to help reduce clutter over time. With this rule, every time a new item comes into your home, one must leave.
Living Room
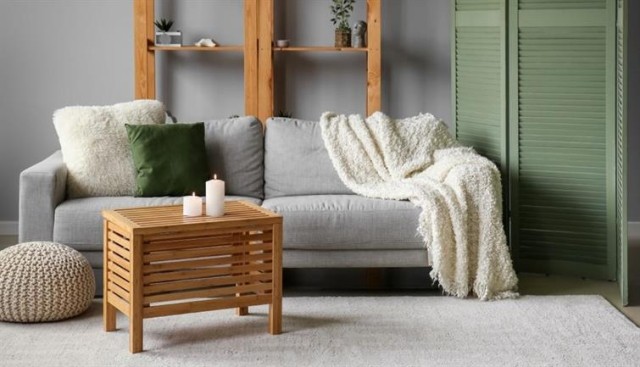
- Purchase furniture like ottomans and chests that can double as storage space.
- Use a room divider with storage to create the illusion of a separate area.
- Use a coffee table with storage underneath or drawers.
- Use a tv stand with storage.
Bedroom
- Use a clothing rack to display unique pieces if you have a small closet.
- Place a small chest or wardrobe in your closet.
- Hang a bar from the ceiling for extra hanging space.
Kitchen
- Use a slider or pull-out bin in deep cabinets to make items easier to grab.
- Use tiered shelving to add more space and increase visibility in smaller cabinets and pantries.
- Use a rolling cart or lazy Susan to hold spices, food, and other kitchen items.
Bathroom
- Use a shower caddy with compartments to organize toiletries like soap and shampoo.
- Store shampoo, conditioner, and other products in dispensers for a uniform aesthetic.
- Avoid placing too many products on countertops.
- Repurpose a bar cart and use it to store toilet paper, towels, and washcloths. Place other toiletries on top.
- Use an acrylic makeup organizer to organize brushes, foundation, lipstick, etc. You can also use upcycled candle jars or mason jars to hold these items.
Maintain an Organized Apartment
Once you finish organizing your space, you can pat yourself on the back; you have transformed your apartment into a clean, orderly home! However, your work isn’t done. Maintaining an organized home requires constant effort. To keep your progress, continually evaluate your apartment space, habits, and belongings to determine which item works best for you and your apartment. And when you feel you’ve outgrown your current space? Apartments.com is here to help.
Search our easy-to-use platform for apartments near and far. Filter your search by bedroom and square footage, and once you find a promising place, review pictures of the unit to see what built-in storage options are available. Getting organized can seem daunting at first, but all your hard work will be well worth it. To find the next Apartment that fits your organizational needs, trust Apartments.com.


