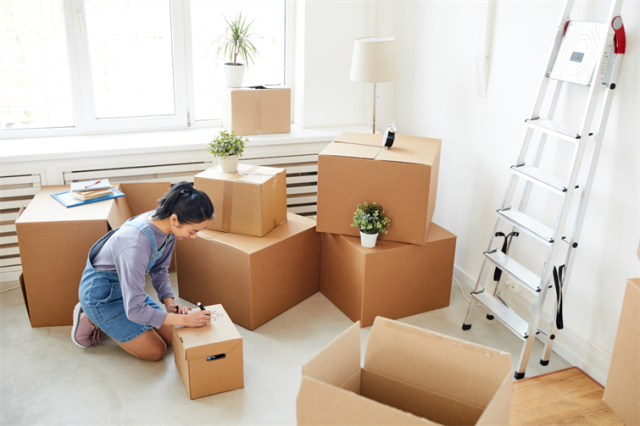
Moving can be such an exciting time and a great opportunity for a new start, so getting to your new space with a positive mindset is essential. By following a few simple tips, you can be on your way to your new home stress free in no time.
Plan a Packing Time Frame
Before you start packing, it’s best to have a packing schedule that includes your moving out to-do list. This will likely differ depending on where you’re moving, but it’s crucial for alleviating stress. If you’re packing up a studio apartment, you won’t have to account for as much time as a family packing an entire house. Nonetheless, having a scheduled time frame before starting the packing process is essential.
The first task on your schedule should be to go through personal items and donate what you don’t want so you don’t waste precious moving box space on things you don’t use. Once you have identified everything you’re taking with you, start by packing the items you use the least and work your way up to everyday essentials.
One of the last tasks on your schedule should include eating or donating your food. Food items won’t travel well and can be bought after you move. A week or so before moving day try finishing up what’s left in your kitchen. If you have canned items or dried good, these can be donated, but perishables will have to be thrown away or composted.
This schedule will look different for everyone and that’s okay. You want to go at your own pace, but make sure you have everything done before moving day.
Gather Your Packing Supplies
Now that you have your packing time frame mapped out, your next task is to gather your packing supplies. Moving boxes are obviously crucial to this operation, but not all are created equal and where to buy moving boxes isn’t always obvious.
You’ll want to make sure your packing boxes are clean, sturdy, and vary in size. It might seem easier to get all large boxes, but keep in mind your heavier items. You won’t be able to safely carry a large box filled with heavy items, so smaller boxes will be a life saver. Your medium boxes will work great for fragile, yet weighty, items like plates, bowls, etc... The large boxes can be filled with non-breakable lightweight items.
Buying brand new moving boxes and packing tape from a hardware store, post office, or shipping and mail store is ideal, but buying or borrowing secondhand through online sellers or friends and family works too. You can even go to a big-box store, and ask if they have any cardboard boxes you can have for free. Just make sure the boxes are sturdy and clean. There’s nothing worse than a busted box on moving day. Stay away from food and liquor store boxes as they can have insects in them. If you don’t want to use cardboard packing boxes, you can invest in reusable plastic containers. These will come in handy for future moves and double as storage boxes in the meantime. Your packing supply list should include the following:
- Moving boxes in a variety of sizes
- Large tip marker or label maker
- Packing tape
- Scissors or packing tape dispenser
- Bubble wrap, packing peanuts, and newspaper
- Dish towels. You can use these to stuff into empty spaces in the boxes
- Box dividers
- A variety size pack of plastic bags
- Box cutter
- A dust rag and multipurpose cleaner so you can clean as you pack and unpack
- Hand truck
Look around and see what you can get secondhand or borrow. Things like bubble wrap and packing peanuts can be saved from online orders, or you can purchase them online (try searching for biodegradable options too). Packing tape dispensers and hand trucks might not be necessary but could save you a lot of time and effort, so it might be worth the extra money. Keep this list or jot it down with anything else you might need so you can move smoothly into the next of part your packing process.
Create Packing Zones
The next step in this process is to create a packing zone. It’s best to pack one room at a time, but set aside items you’ll need to use on a daily basses because these will be the last things you pack. Then start gathering similar items and place them in groups.
For example, if you want to start packing your office, your office is now your packing zone. To create your zone, you’ll first identify anything you’ll need to use up until moving day and set aside. Then go to one area of the room and start grouping items based on size, weight, and breakability. If you start with your desk, something like a glass paperweight would be small but breakable. Your monitor and computer are heavy and fragile, but miscellaneous office supplies like pens, notebooks, stapler, etc.… are small, light, and not as fragile. Put the desk items into their respective groups, and once you’re done with the desk, move to another part of the room and add to your groups.
Keep in mind that each group might not fit in one box, or some of your groups will be smaller than others. Don’t add things from other rooms as it will make the unpacking process longer. These groups of like items are for giving you an idea of what types of items need to be packed from each room.
How To Choose the Right Box
Strategic packing is essential for optimizing space and saving time in the long run. After you gather like items in your packing zone, take note of what box should go with each group. You should have a small, medium, and large box option.
Your heaviest objects should go in small boxes so you can fill the space while not sacrificing your back. Your small and medium packing boxes with dividers work for fragile pieces like plates, bowls, and glass. If you don’t have dividers, make sure that none of the breakables are touching by using towels and newspaper between. Your larger boxes are great for small, light, and unbreakable items.
Start Packing Your Boxes
Now that you’re in your packing zone with your packing groups and correct box sizes, it’s time to finally start putting your belongings into the boxes for moving. This too should be done strategically. Your relatively heaviest and sturdiest items should be placed on the bottom of the box and items should get smaller and lighter as you go up, but make sure you’re still packing similar objects together. The goal is to fill your box completely, but it shouldn’t weigh more than 30 pounds, so filling in empty space with packing filler is sometimes necessary.
Any fragile piece should be wrapped with bubble wrap and then placed in the moving box, ideally into a box divider. If you have extra towels, you can place them over the top of fragile items for an extra layer of protection. You’ll need to label each box with the room and main items included so you know how to stack the boxes later.
Once your boxes are filled and labeled, it’s time to seal them. Your packing tape should go in two places: one strip down the middle pushing the box flaps closed, ensuring there’s no gap between flaps, and another strip across the top. Your tape should make a “T” shape.
How To Stack Moving Boxes
Once the hard part is over and you have your boxes packed, labeled, and sealed, you’ll need to stack your boxes in the truck. Before stacking, make sure that the labels are facing forward, and make note of where you’re going to put the stack so you can walk in between when you unload. Try to keep boxes from the same rooms together, so you can easily unload the truck.
The heaviest boxes should be on the bottom and get lighter as you go up, placing fragile boxes on the very top. Stack them in a brick or pyramid pattern so the weight is staggered and not resting on one box.
Packing a moving box isn’t difficult, but following the right steps are critical to the moving process. Taking the time to make a moving day game plan and following these easy tips will ensure that future you gets into your new space on the right foot with a positive attitude. Happy packing!


